Project Name: Part Documented
L5Part ConnectorDocumented: anti-theft<MATCHES chain link:TITLE>
Materials Used:1x 2x
2x (optional)
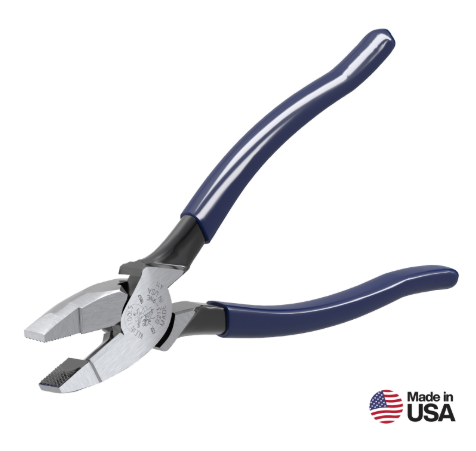
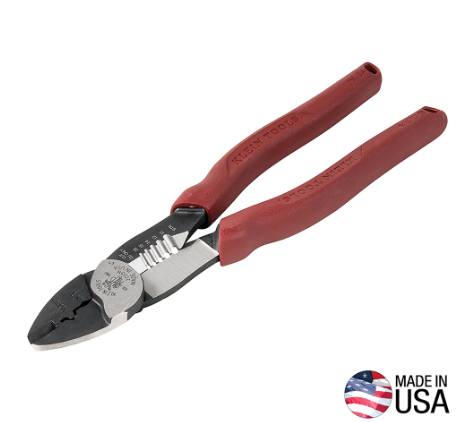
Tools Needed:1x <Image of
Example: 1x Ferrule Crimp (I cheat and use a more affordable Forged Wire Crimper, Klein Tools 2005N)
|
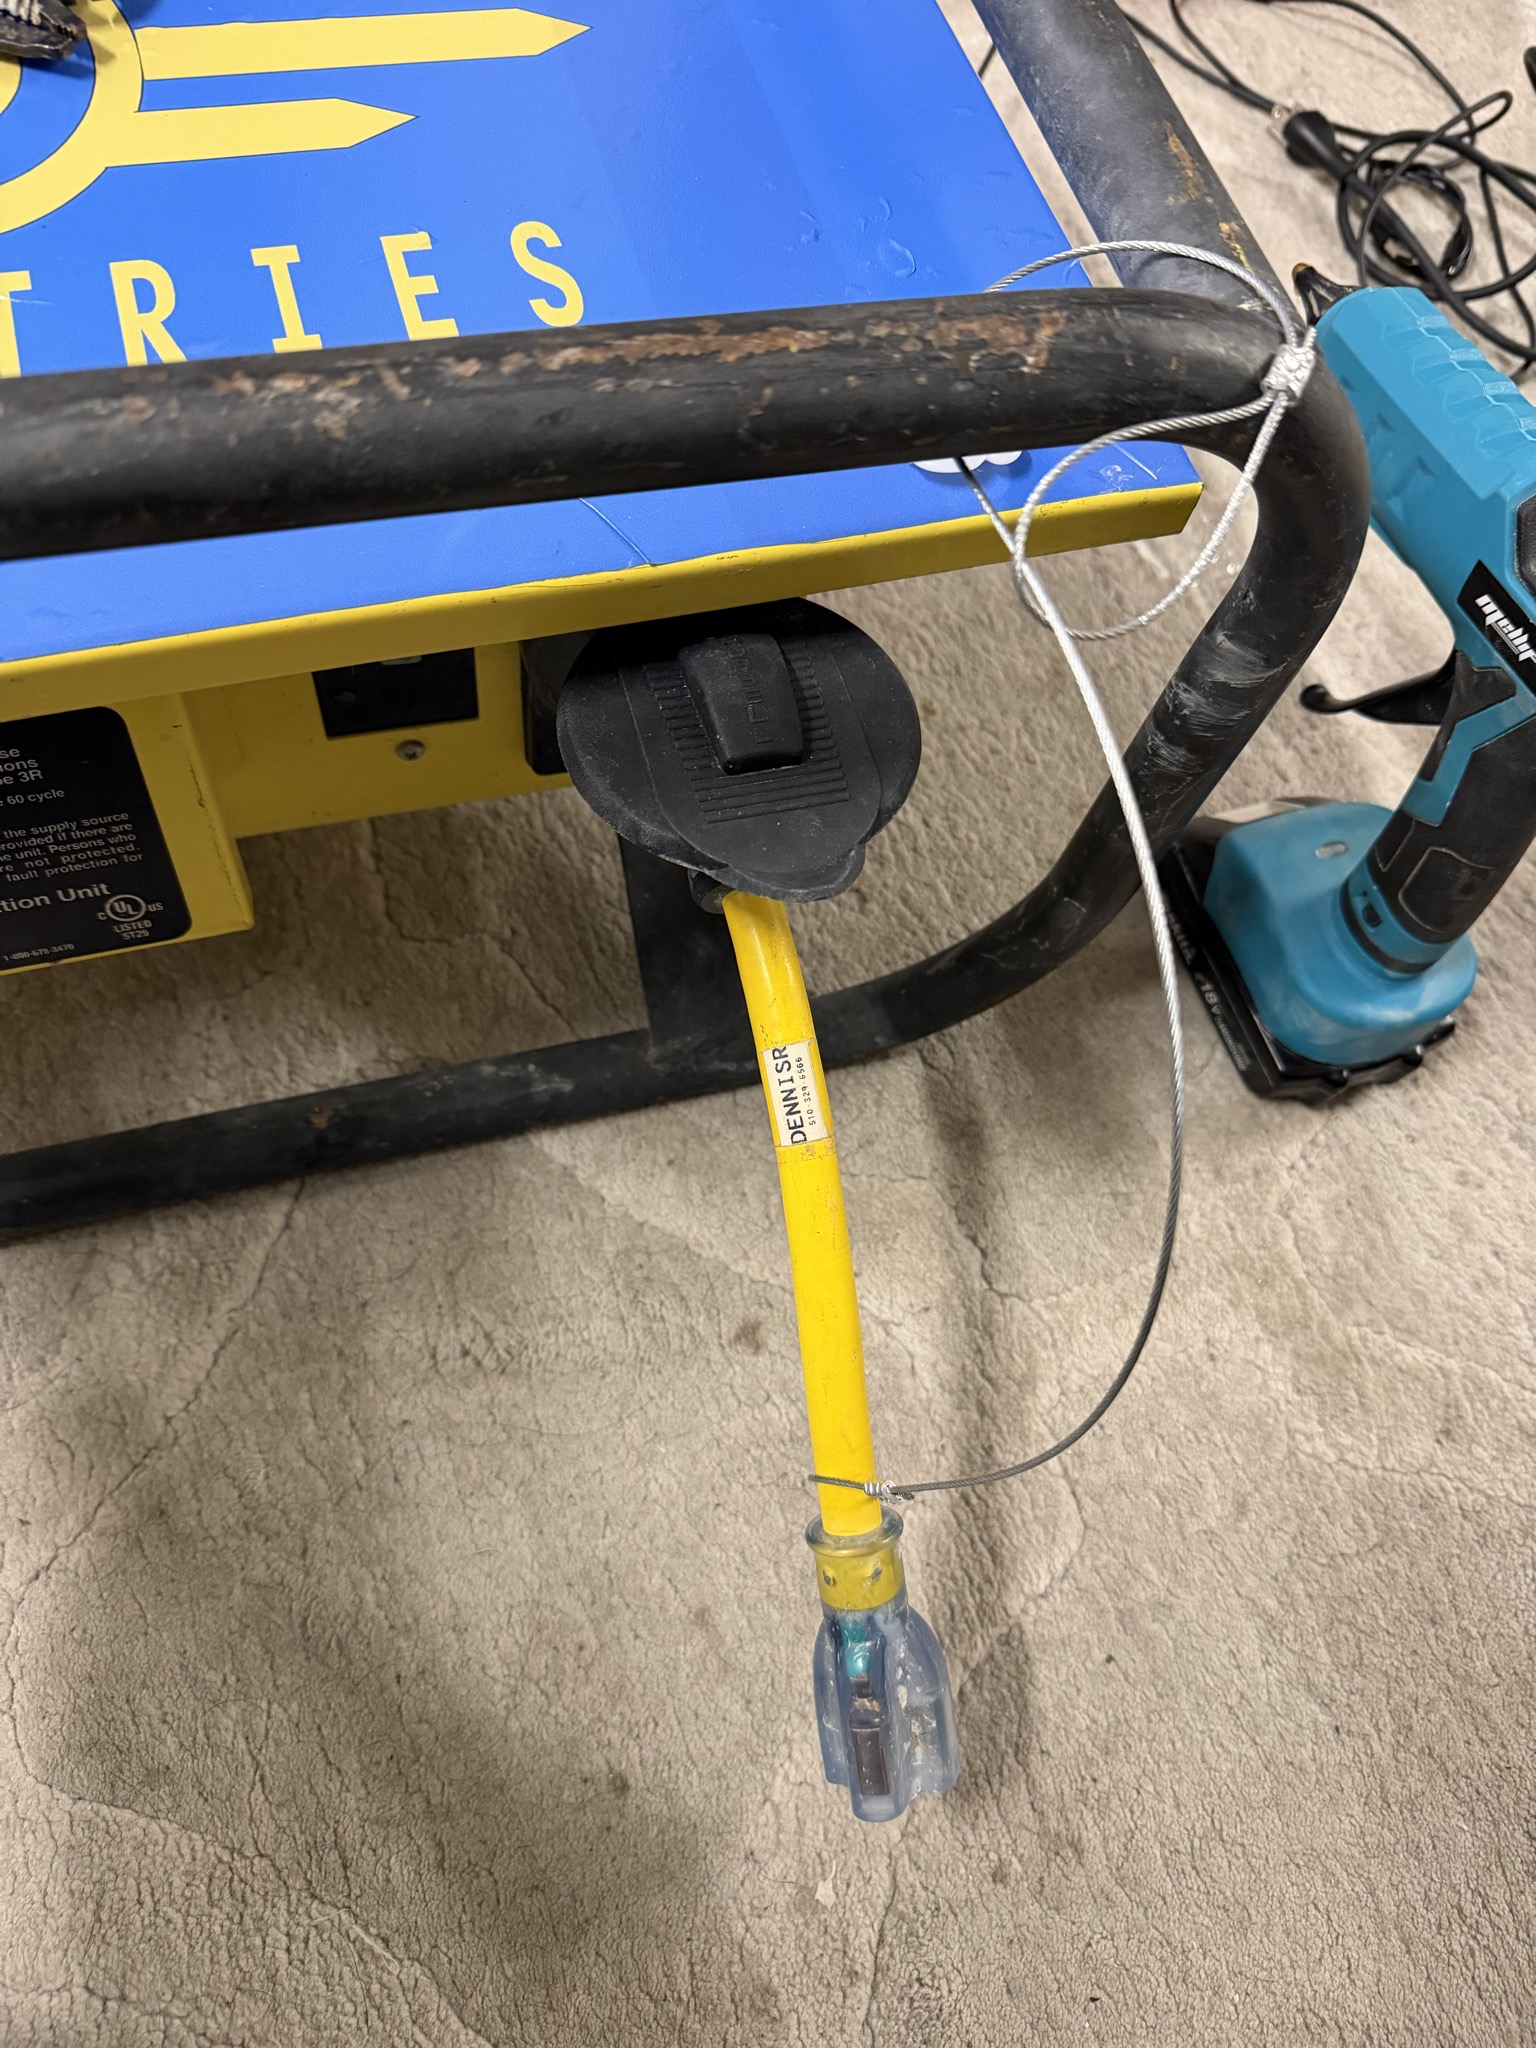 <Image of Final Product |
How to Build:
ReadingBesure aboutto thisreference whileany atwarnings UnScruz or the Burn? Find DennisR/Overseer, I carry little kits with all the necessary components.here
Step One: Gather Materials
Everything<Description of where to purchase or acquire the parts or tools listed here is available at Home Depot for affordable prices.above. ThisNOT isA aboutSPACE aTO $20LIST project, including the adapter but without tools. $2.50 without. If you're just making one or two, I would avoid buying the Tools; Home Depot staff can cut the 28" steel wire for you from their "purchase per foot" spool. One of your friends will have a pair of wire strippers with a wire crimp in its handle, or check out your local library if they have a tool rental program. Oakland Library's loan tools; these tools are most likely in their inventory. Borrowing them saves you $70.MATERIALS>
Step Two: Secure<Start the AdapterBuild toGuide>
<a description of the cablestep
Important: Do not pullof the wire rope tight around the L5 adapter, as it will slowly chew away at the plastic cable shielding if it can't rotate. Leave enough extra wire in the loop for it to move freely around the L5 Adapter.
Slide the Ferrule down the wire and create a loop around the L5 Adapter, leaving about 3/4" excess through the Ferrule. Because the loop's radius is so small/tight, you will need to hold the wires/furrule in place to crimp it. Using my non-dominant hand, I pinch both wires process>
<IMAGE> |
<IMAGE> |
<IMAGE> |
Note: If you're adding Heat Shrink [Step Four], add it to the cable now, don't heat it down till the end but add it before you create the second loop.
EXAMPLE: Step Three: Create the Locking Loop
Slide the Ferrule down the other side of the wire and create a loop just slightly bigger than the large end of the L5 Adapter, leaving about 3/4" excess through the Ferrule. Crimp the cable, and you're done!
| Slide the Wires through the Ferrule and around the Adapter, being tight enough that they can't slide through, but loose enough that the adapter can move freely. <IMAGE> |
Using my non-dominant hand, I pinch both wires below the Ferrule to hold it in place.
<IMAGE> |
Using your Crimp tool, crimp 1/4th of the Ferrule on the edge. Once the first crimp is done, you can let go of pinching the end and move the ferrule around as needed for effective crimping <IMAGE> |
Step Four: Optional Features:
Add a Label withList your contactoptional infoFeatures: Ilist useone 1.5x1"option Selfpart Laminatingand labelsits usedadditional forinformation CatXhere cables. They have a small label, .75"x1", with a long clear laminating half ofas the sticker design to wrap around a smaller cable once or twice. I double them up, adding two labels so my contact info is on both sides. Keep it simple, I recommend just your First name, last initial, and your phone number. Mine says "DENNISR" with my number under the name, or "PLEASE RETURN" with my number under it.
step.
|
Add heatshrink over the crimps: Over time, the tail ends sticking out of the crimped surface will fray. It's recommended to treat the ends, but since the 1/16th cable is so small, there aren't many options. Most of the time, I see a thick, most likely two-layer, heatshrink over the Ferrule and the extra tail of wire. If you have advice on this one, please let me know. I've also seen people add solder to the ends to prevent fraying and extend longevity.