Spider Box Projects: Vinyl Wrapping
Vinyl Wrapping
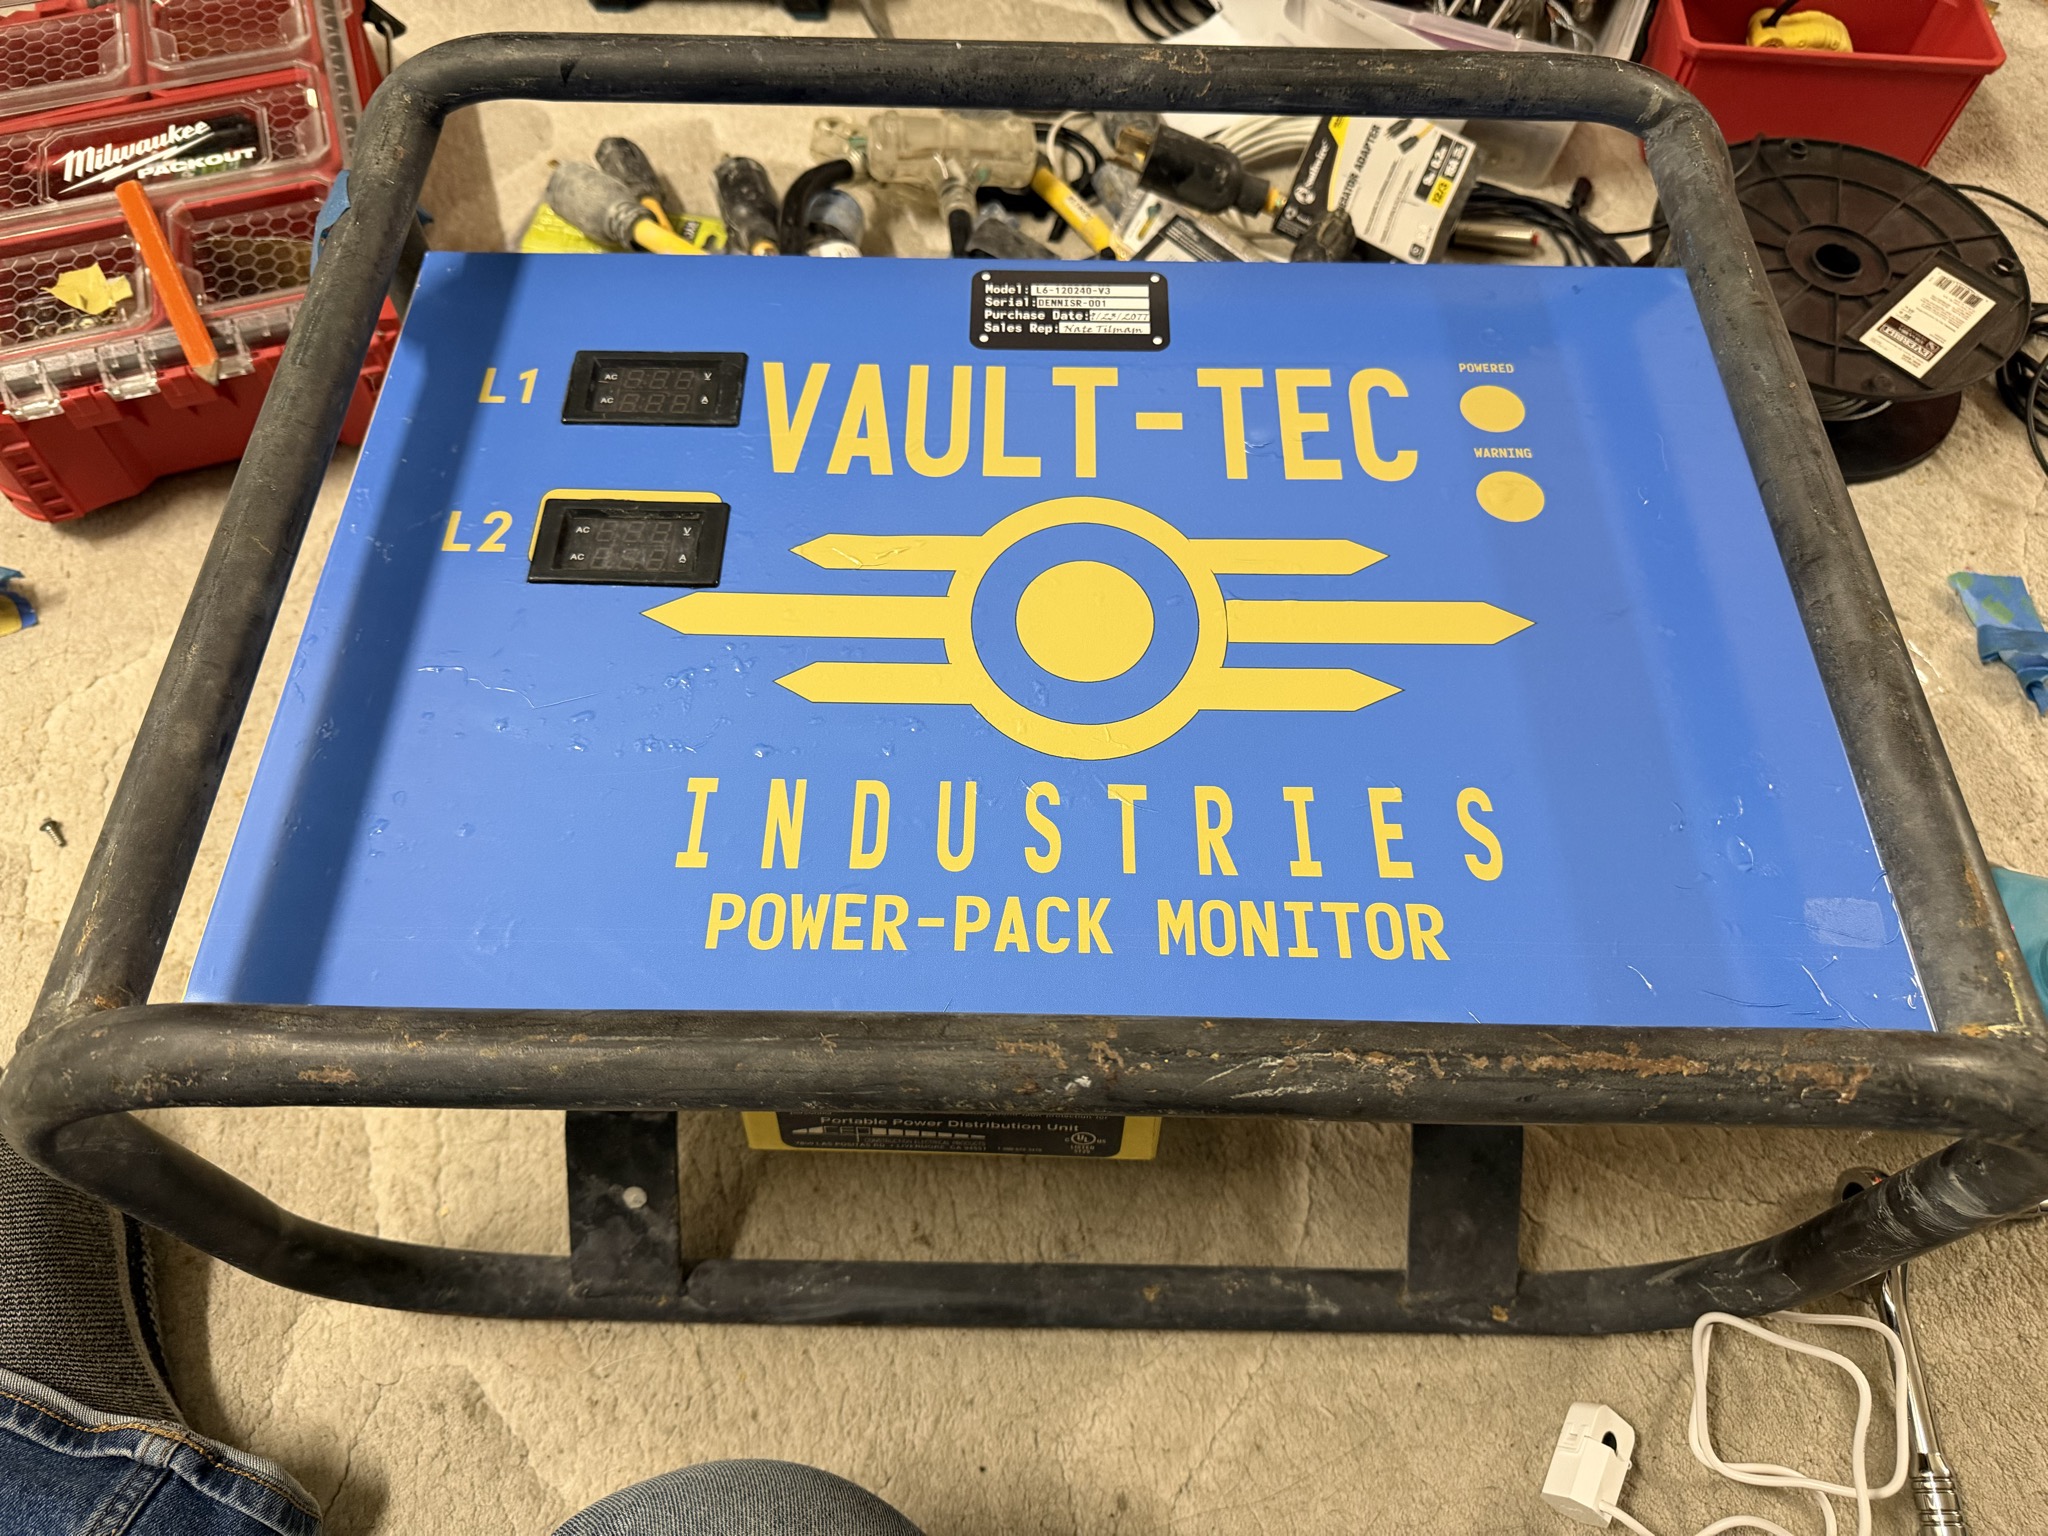
I've always wanted to paint my tow behind generator Blue with Vault-Tec branding. As I don't currently have a generator, I thought I'd do my Spiderboxes. Having created the them camp Vault 21+ on Playa, it just made sense to keep the Fallout theme running. Materials Used:1x Vinyl Wrap, printed by my favorite shop, 11.5 x 22" 1x Various Heavy Duty cleaners and degreasers Tools Needed:Heat Gun - Bauer [Harbor Freight] carries one for $35. If you buy a $150 Milwuakee one, you'll waste $115... It's a heat gun. (Say's the guy with his $215 cordless Makita Heat gun)
|
Disclaimer: Vault-Tec is trademarked by ZeniMax Media Inc, the owners of Bethesda. This was done purely for fun; I have not, and will not, gain any profit from this. Please don't sue meeeee. Also, that is why the template used is not listed here for public download, and I will not be sharing it. |

How to Build:
Step One: Gather Materials
Don't use my design; be creative and create something unique to you.you! Create your own sticker with notes and warnings. I've always wanted to create a complete technical drawing of the electrical layout in the spider box for the cover plate.
The drawing was done in Adobe Illustrator with an art board of 11.5 x 22". The actual drawing has curved corners that I really liked, but to keep the cost down, [about $15-20 a print!]. it didn't go through a plotter, so all the cutting is on me to do at home.

I also made a pretend nameplate sticker as a part of the overall sticker. It might make more sense to make these as an alternative
sticker that you just add. I was being a little lazy and just added them.
I like looking through Sci-Fi games or movies [Especially 1970/1980s films: Alien / 5th Element, Avatar, Halo, Thunderbirds are Go,
Step Two: <Start the Build Guide>
<a description of the step of the process>
| Steps Should include Photos <IMAGE> |
And be broken up into no more then
<IMAGE> |
Three images and escriptions. <IMAGE> |
EXAMPLE: Step Three: Create the Locking Loop
Slide the Ferrule down the other side of the wire and create a loop just slightly bigger than the large end of the L5 Adapter, leaving about 3/4" excess through the Ferrule. Crimp the cable, and you're done!
| Slide the Wires through the Ferrule and around the Adapter, being tight enough that they can't slide through, but loose enough that the adapter can move freely. <IMAGE> |
Using my non-dominant hand, I pinch both wires below the Ferrule to hold it in place.
<IMAGE> |
Using your Crimp tool, crimp 1/4th of the Ferrule on the edge. Once the first crimp is done, you can let go of pinching the end and move the ferrule around as needed for effective crimping <IMAGE> |
Step Four: Optional Features:
List your optional Features: list one option part and its additional information here as the last step.